
1. Why install OpenClaw on a Linux VPS
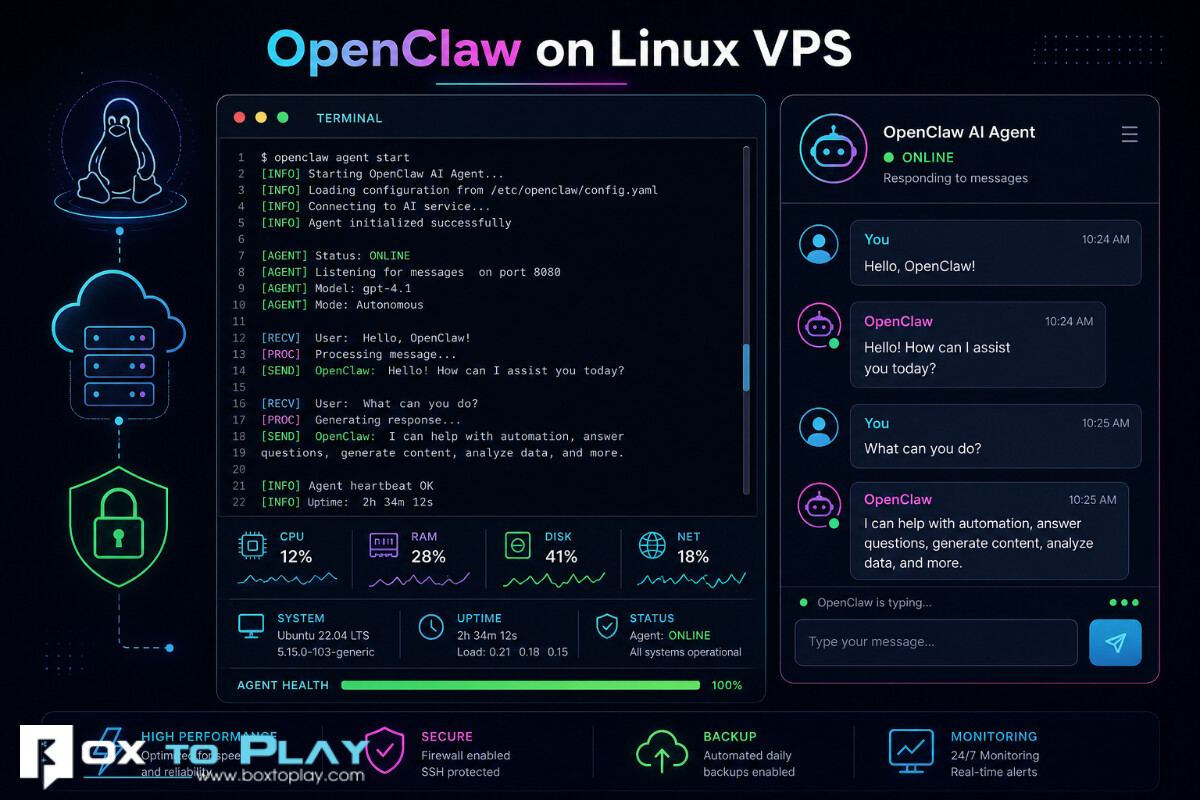
OpenClaw lets you run an AI agent on your own Linux server, with your configuration, your API keys, and your integrations. On a VPS, this lets you keep control of the runtime environment while the agent keeps running continuously.
This kind of deployment is useful if you want to:
- centralize several tools behind a single AI interface
- run a bot or assistant continuously
- keep data and configuration on the server side
- access the dashboard remotely without depending on a local computer being powered on
In this guide, we will cover installation, remote access, AI provider configuration, service management, maintenance, and the main security points that matter on a VPS.
2. Prepare your Linux VPS
To follow this tutorial, you need:
- a Linux VPS with SSH access
- a user account that can install packages if needed
curlandgitif you use the install script or the source install pathcorepackif you plan to use the advanced Git-based path withpnpm- an API key from a model provider to finish the setup
For the runtime, OpenClaw recommends Node 24. Node 22 remains compatible starting from Node 22.16.
On Debian or Ubuntu, you can install the base utilities if needed:
sudo apt update
sudo apt install -y curl git
3. Fast installation with the install script
If you want the simplest method, the official install script can prepare the environment and launch the installation automatically.
curl -fsSL --proto '=https' --tlsv1.2 https://openclaw.ai/install.sh | bash
On a Linux VPS, this script detects the distribution, installs Node if needed, then installs OpenClaw.
If you prefer to install OpenClaw without starting onboarding immediately:
curl -fsSL --proto '=https' --tlsv1.2 https://openclaw.ai/install.sh | bash -s -- --no-onboard
You can then finish the installation with the command recommended for a VPS:
openclaw onboard --install-daemon
4. Recommended manual installation with Node and npm
If you prefer to control each step, install Node first, then the OpenClaw CLI.
Start by checking your Node version:
node -v
If Node is not installed yet, install Node 24, or at minimum Node 22.16, using the method that matches your distribution.
Then run:
npm i -g openclaw@latest
openclaw onboard --install-daemon
The onboarding command configures OpenClaw and installs the gateway daemon, which fits most VPS deployments.
5. Install from source, advanced case
If you have a specific reason to run OpenClaw from the Git repository instead of the npm package, use this method:
git clone https://github.com/openclaw/openclaw.git
cd openclaw
corepack enable
corepack prepare pnpm@latest --activate
pnpm install
pnpm build
pnpm ui:build
pnpm link --global
openclaw onboard --install-daemon
For a typical VPS, prefer the npm installation shown above.
6. Access the dashboard remotely and securely
On a VPS, the right approach is to keep the OpenClaw gateway reachable only locally, then open a tunnel from your own computer.
Start by checking the Gateway status and the actual configured port:
openclaw gateway status
If you need remote access, prefer an SSH tunnel:
ssh -N -L 18789:127.0.0.1:18789 user@your-vps
Then open this in your local browser:
http://127.0.0.1:18789/
You will then use the token or password configured during onboarding to authenticate.
On the Gateway login screen, check the local WebSocket URL, the authentication mode, and the connection secret. With an SSH tunnel, keep a local URL such as:
ws://127.0.0.1:18789
Avoid replacing that field with the raw public IP of your VPS.

Once the connection is applied, the dashboard should show a correct connection state. If the interface does not connect, first recheck the SSH tunnel, the connection secret, and the Gateway port before changing the configuration.
If you prefer a public URL instead of an SSH tunnel, the Nginx + HTTPS variant below lets you publish access cleanly without exposing the Gateway port directly.
6.1. Public access with Nginx and HTTPS
If you prefer browser access through a public URL rather than an SSH tunnel, do not expose the Gateway port directly on the Internet. Keep OpenClaw listening on 127.0.0.1:18789, then place Nginx in front with HTTPS.
That gives you a simple URL such as:
https://openclaw.example.com
while keeping the actual OpenClaw service private on the VPS.
Recommended architecture:
Internet
↓
Nginx over HTTPS
↓
OpenClaw Gateway locally on 127.0.0.1:18789
Before you begin, point the chosen domain or subdomain to the public IP address of the VPS.
Install the required packages:
sudo apt update
sudo apt install -y nginx certbot python3-certbot-nginx
Create a dedicated Nginx vhost:
sudo nano /etc/nginx/sites-available/openclaw
Start with a simple HTTP configuration so Certbot can issue the certificate:
server {
    listen 80;
    server_name openclaw.example.com;

    location / {
        return 200 "OpenClaw Nginx vhost is ready\n";
        add_header Content-Type text/plain;
    }
}
Enable the site, validate the configuration, reload Nginx, then generate the HTTPS certificate:
sudo ln -sf /etc/nginx/sites-available/openclaw /etc/nginx/sites-enabled/openclaw
sudo nginx -t
sudo systemctl reload nginx
sudo certbot --nginx -d openclaw.example.com
Once the certificate is generated, replace the configuration with this final version:
server {
    listen 80;
    server_name openclaw.example.com;

    return 301 https://$host$request_uri;
}

server {
    listen 443 ssl http2;
    server_name openclaw.example.com;

    ssl_certificate /etc/letsencrypt/live/openclaw.example.com/fullchain.pem;
    ssl_certificate_key /etc/letsencrypt/live/openclaw.example.com/privkey.pem;

    add_header Strict-Transport-Security "max-age=31536000; includeSubDomains" always;

    client_max_body_size 20m;

    location / {
        proxy_pass http://127.0.0.1:18789;

        proxy_http_version 1.1;
        proxy_set_header Upgrade $http_upgrade;
        proxy_set_header Connection "upgrade";

        proxy_set_header Host $host;
        proxy_set_header X-Real-IP $remote_addr;
        proxy_set_header X-Forwarded-Proto https;
        proxy_set_header X-Forwarded-For $proxy_add_x_forwarded_for;

        proxy_read_timeout 3600s;
        proxy_send_timeout 3600s;
    }
}
Validate and reload Nginx:
sudo nginx -t
sudo systemctl reload nginx
For public-domain access, also add the allowed HTTPS origin in the OpenClaw configuration. If the file does not exist yet, create it:
nano ~/.openclaw/openclaw.json
Minimal example for a local Nginx running on the same VPS as OpenClaw:
{
  gateway: {
    controlUi: {
      allowedOrigins: ["https://openclaw.example.com"]
    },
    trustedProxies: ["127.0.0.1/32", "::1/128"]
  }
}
Open ~/.openclaw/openclaw.json and add these keys inside the existing configuration. Do not overwrite the whole file with this example.
In this tutorial, with Nginx running on the same VPS as OpenClaw, always configure these three points:
gateway.controlUi.allowedOriginswith your public HTTPS domaingateway.trustedProxieswith127.0.0.1/32and::1/128- native Gateway password or token authentication
trustedProxies is required in this local Nginx → OpenClaw setup. Without it, the first public web connection can be treated as untrusted, which leads to pairing or authorization errors that are hard to understand.
If HTTPS terminates on another machine, replace 127.0.0.1/32 and ::1/128 with the real IP or CIDR of that proxy.
Then restart the Gateway:
openclaw gateway restart
When you open the dashboard from the public URL, use:
https://openclaw.example.com
If the interface asks for a Gateway WebSocket URL, use this instead:
wss://openclaw.example.com
Do not use the raw public IP of the VPS as the Gateway URL. In this setup, public access is supposed to go through the HTTPS domain exposed by Nginx: that is what matches the TLS certificate, gateway.controlUi.allowedOrigins, and the configured public proxy path. Using the raw IP is likely to fail on certificate or origin checks, or to bypass the intended route to the Gateway.
If you want to add HTTP Basic Auth in front of Nginx later, do it only after validating that HTTPS + native OpenClaw auth already works correctly. Depending on the client or browser, an extra HTTP auth layer can disrupt the Control UI WebSocket flow if it is badly placed or insufficiently tested.
6.2. First public connection and browser pairing
On the first connection from a new browser, OpenClaw can ask for a one-time device approval before fully opening the public Control UI. This behavior is normal.
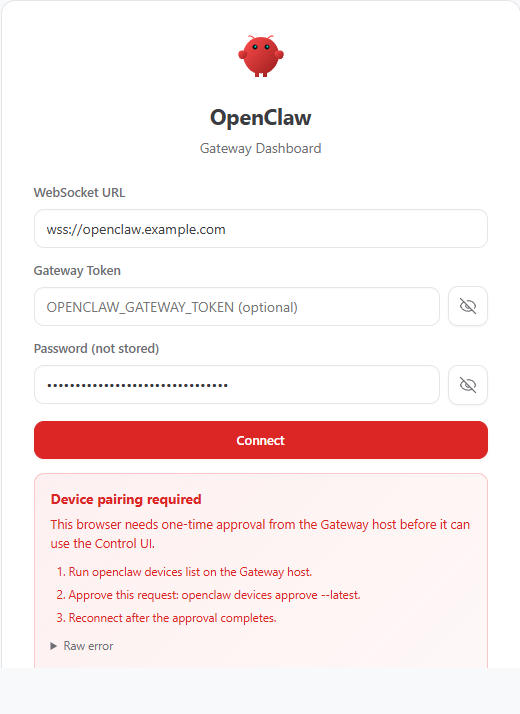
If the interface shows Device pairing required, connect to the VPS over SSH and first run:
openclaw devices list
Then approve the most recent pending request:
openclaw devices approve --latest
If you want to approve a specific request, you can also use the exact request id:
openclaw devices approve <requestId>
And if the CLI explicitly asks for the Gateway secret, simply add the password configured during onboarding:
openclaw devices approve --latest --password 'your-gateway-password'
Once the approval is complete, reload the page or click Connect again. In most cases, you only need to do this once per approved browser or device.
If you use UFW, check its status first:
sudo ufw status
If UFW is already active, simply add the useful rules. The OpenSSH profile is only there to preserve your SSH admin access to the VPS and the tunnel shown above, not OpenClaw itself:
sudo ufw allow OpenSSH
sudo ufw allow 80/tcp
sudo ufw allow 443/tcp
sudo ufw deny 18789/tcp
If UFW is not enabled yet on your VPS and you want to use it, enable it afterwards:
sudo ufw enable
If you manage filtering directly with iptables, keep the same logic: allow SSH, HTTP, and HTTPS, then block port 18789 from outside. Do not block local loopback traffic, because Nginx still needs to reach OpenClaw on 127.0.0.1.
If your SSH server listens on a different port, replace 22 with the correct value.
Example:
sudo iptables -A INPUT -p tcp --dport 22 -j ACCEPT
sudo iptables -A INPUT -p tcp --dport 80 -j ACCEPT
sudo iptables -A INPUT -p tcp --dport 443 -j ACCEPT
sudo iptables -A INPUT ! -i lo -p tcp --dport 18789 -j DROP
If you want to stay on purely private access, the SSH tunnel remains the simplest option. A private VPN or a similar private mesh network is also a good alternative if you want more permanent private access without exposing the Gateway directly on the Internet.
7. Verify the installation and run a first test
Once OpenClaw is installed, here are the most useful commands:
openclaw --version
openclaw doctor
openclaw status
openclaw gateway status --deep
These commands help you quickly spot a PATH, Node version, configuration, or gateway issue.
They let you verify:
- that the CLI is available in your
PATH - that the configuration does not contain an obvious error
- that the gateway is installed and responding correctly
To follow the logs live:
openclaw logs --follow
The goal is not to read every line of output, but to confirm that no blocking error appears during startup. If the CLI is healthy and the dashboard opens correctly, you can move on to provider configuration before the first real chat test.
7.1. Configure the AI provider and API key before the first test
The key place to know for connecting OpenAI or another provider is Settings > AI & Agents > Models. In this view, you add or edit a provider entry, then tell OpenClaw how to talk to your AI backend.
The Model Provider API Adapter field is used to choose the protocol expected by your provider. For an OpenAI-compatible backend, you will usually choose openai-responses or azure-openai-responses. For Anthropic, the expected value will generally be anthropic-messages, and for Gemini google-generative-ai.
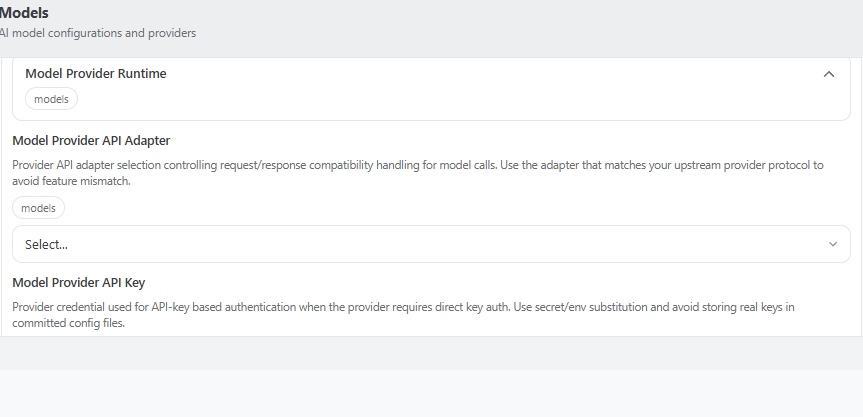
Just below that, Model Provider API Key is where you paste your API key. The same card also lets you adjust the authentication mode, the provider base URL, and the list of models exposed in the interface.
The path to remember is simple: open Settings, go to AI & Agents, switch to Models, then edit your provider entry before saving. This is where you connect OpenClaw to your OpenAI, Anthropic, Gemini, or any other compatible backend key.
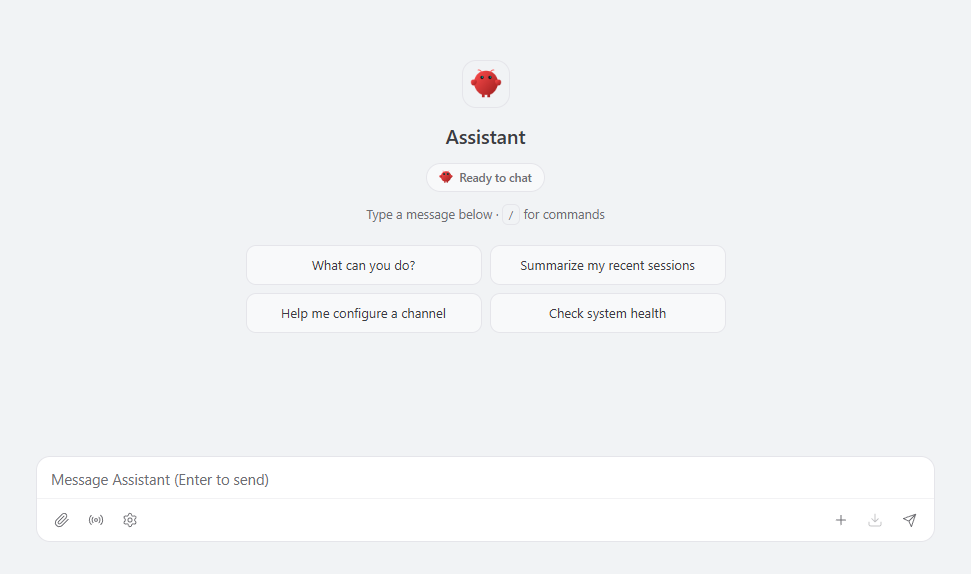
Once this configuration is saved, go back to the Chat tab. That is when you can launch a first useful exchange and verify that the interface is actually responding through the provider you just connected.
8. Manage the service on a VPS
On a typical VPS, you usually do not need to write a systemd service by hand. The following commands cover the standard case:
openclaw onboard --install-daemon
or
openclaw gateway install
For day-to-day service operations:
openclaw gateway status
openclaw gateway restart
openclaw logs --follow
These commands let you check the service state, restart it cleanly, and follow logs immediately.
On Linux, OpenClaw usually installs a user-level systemd unit. If the service does not stay active after your SSH session ends, enable linger for your account:
sudo loginctl enable-linger $USER
On a headless VPS, check this if the service stops after you disconnect from SSH.
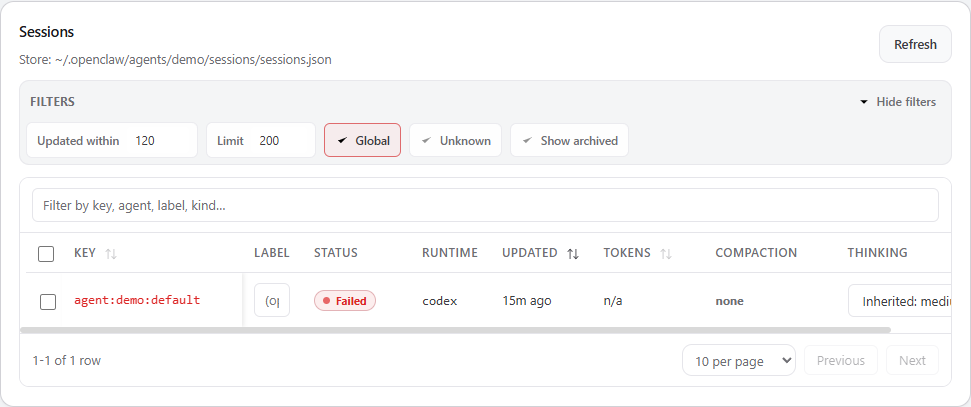
To visually confirm that OpenClaw keeps your conversations in the interface, the Sessions view gives a quick overview of the active sessions currently tracked by the agent.
If you need to re-enable the user unit explicitly:
systemctl --user enable --now openclaw-gateway.service
If you use a named OpenClaw profile, the service name may look like this:
systemctl --user enable --now openclaw-gateway-<profile>.service
If you want a dedicated system service, you can also create a manual unit under /etc/systemd/system/openclaw-gateway.service instead of relying only on the user-level unit.
9. Maintenance, updates, and uninstall
To keep your instance up to date:
openclaw update
openclaw doctor
openclaw gateway restart
If you want to cleanly uninstall OpenClaw, first see what will be removed:
openclaw uninstall --dry-run
Then run the uninstall if the result looks right:
openclaw uninstall
10. Secure messaging channels
If you connect OpenClaw to Discord, Telegram, WhatsApp, Slack, or other channels, do not open DMs publicly without guardrails.
Keep these simple rules:
- keep a pairing-style or allowlist policy for private messages
- explicitly allow only the senders or accounts you expect
- avoid open mode until you have validated your access configuration
- clearly separate normal user access from administration or approval actions
On several integrations, pairing mode exists precisely to prevent an unknown sender from talking freely to your agent from the very first message.
11. Common problems and solutions
11.1. openclaw: command not found
The CLI is usually not in your PATH.
First check the global npm prefix:
npm prefix -g
Then add the related bin directory to your shell profile:
echo 'export PATH="$(npm prefix -g)/bin:$PATH"' >> ~/.bashrc
source ~/.bashrc
Then test again:
openclaw --version
11.2. Node version too old
Check your version:
node -v
If you are below Node 22.16, update Node before running the installation again.
11.3. The gateway does not start or the port is already in use
The most useful commands are:
openclaw gateway status
openclaw gateway status --deep
openclaw doctor
First check the actual configured port, then adapt your SSH tunnel or your configuration if that port is already used by another service.
11.4. The service stops after SSH disconnect
On a headless server, verify that user-level systemd linger is enabled:
sudo loginctl enable-linger $USER
11.5. Permission errors on ~/.openclaw
If you see Permission denied or EACCES, make sure you always use the same user account to run OpenClaw, then fix the permissions:
sudo chown -R $USER:$USER ~/.openclaw
12. Security best practices
For a clean VPS deployment:
- keep the gateway bound to
127.0.0.1 - prefer an SSH tunnel, or a private VPN or similar private mesh network if you want more permanent private access
- if you expose a public URL, use HTTPS, Nginx, and the native OpenClaw Gateway authentication
- if you add an auth layer in front of Nginx, always revalidate the Control UI WebSocket flow before keeping it in production
- never publish the OpenClaw Gateway port directly on the Internet
- always verify the Gateway authentication mode before opening remote access
- back up
~/.openclawregularly - avoid mixing multiple sensitive uses under the same system account
13. What next
Once OpenClaw is working on your VPS, you can add channels, connect tools, and evolve your agent according to your needs. If you want to test this setup on a machine suited for this kind of use, you can launch your VPS server for free and follow the same steps from this guide.
More Articles
Complete Tutorial: Install n8n on Linux with Docker Compose
May 13, 2026Install Docker on Linux: A Practical Getting Started Guide
May 10, 2026How to install Apache2 on a BoxToPlay Linux VPS
April 30, 2026What is a VPS server?
June 09, 2025