 Do you want to install a plugin or mod that requires opening a port on your server? You’re in the right place!
Example with the Simple Voice Chat plugin:
 With a reserved port → players can talk to each other via in-game voice chat
 Without a reserved port → the mod starts, but nobody can hear each other. Voice chat does not work.
In general, if a plugin needs to send or receive data outside of Minecraft (voice, web page, votes, etc.), it requires a reserved port.
![]() If a plugin asks you to configure a “port”, you will need a reserved port.
If a plugin asks you to configure a “port”, you will need a reserved port.
![]() In this guide, we will see how to retrieve your reserved port from the BoxToPlay panel, then how to actually use it with a plugin.
In this guide, we will see how to retrieve your reserved port from the BoxToPlay panel, then how to actually use it with a plugin.
![]() We will use Simple Voice Chat as an example, but the method is the same for all plugins that require a port (BlueMap, Dynmap, Votifier, Plan, etc.).
We will use Simple Voice Chat as an example, but the method is the same for all plugins that require a port (BlueMap, Dynmap, Votifier, Plan, etc.).
 Step 1: How to use a reserved port on BoxToPlay?
-
Log in to your BoxToPlay panel
-
Select the relevant server
-
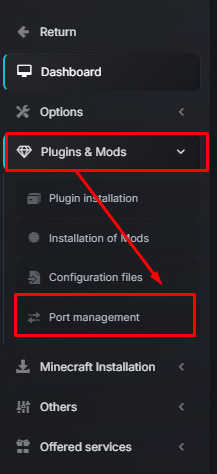
Click on Plugins & Mods
-
Go to the Port Management section
-
Click on Reserve a new port

-
A port will be automatically assigned and will appear in your list like this:

-
You can give your port a description so you don’t forget which service it is assigned to. In our case, we will put Voice Chat for this example:


Step 2: Configure your service
-
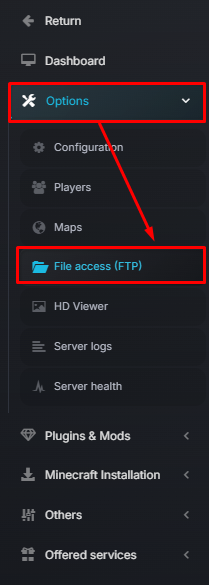
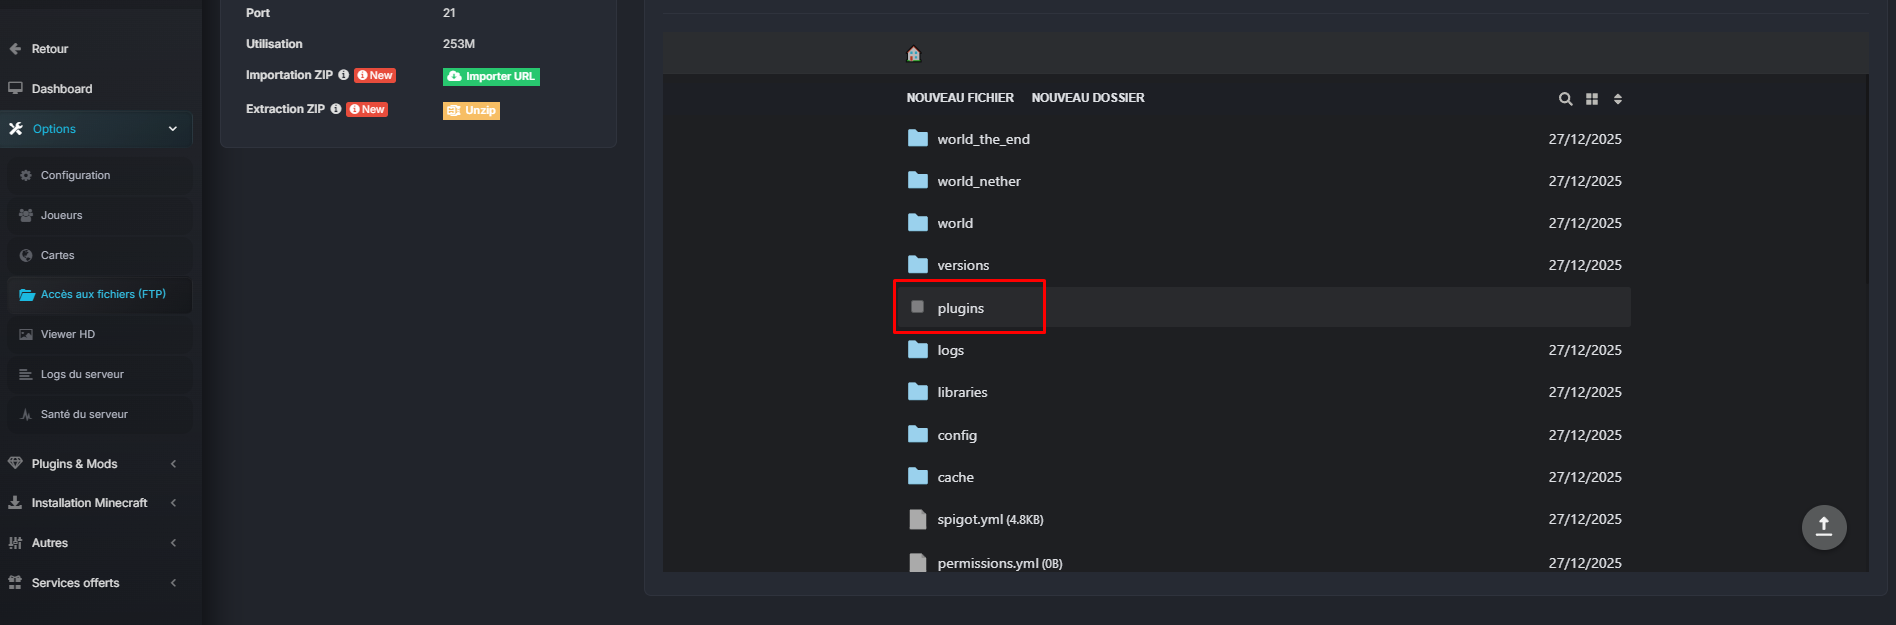
Go to Options → File access (FTP) or Plugins & Mods → Configuration files
-
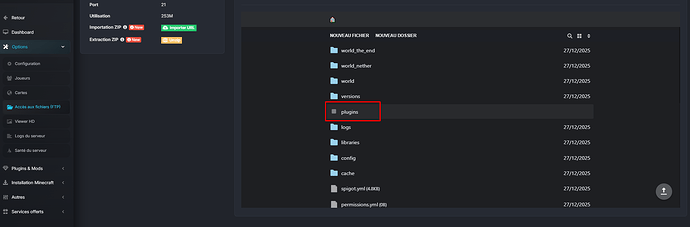
On the right, we have our files. Go to the plugins folder.
-
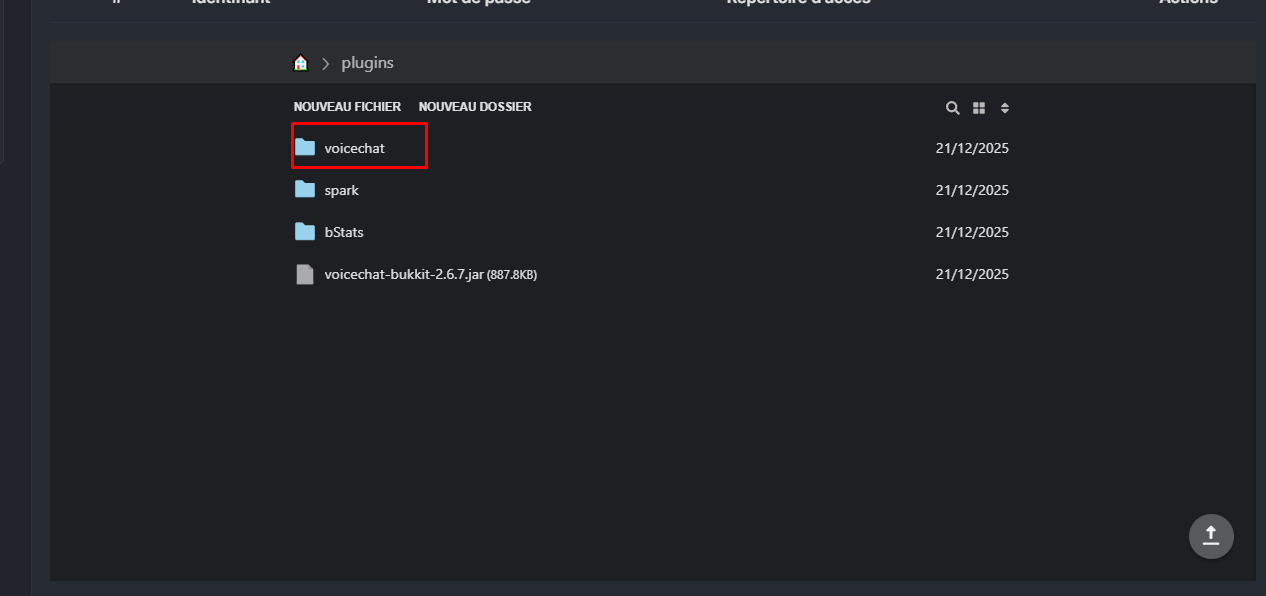
Then go to the configuration of the plugin we are interested in, here it will be Voicechat

-
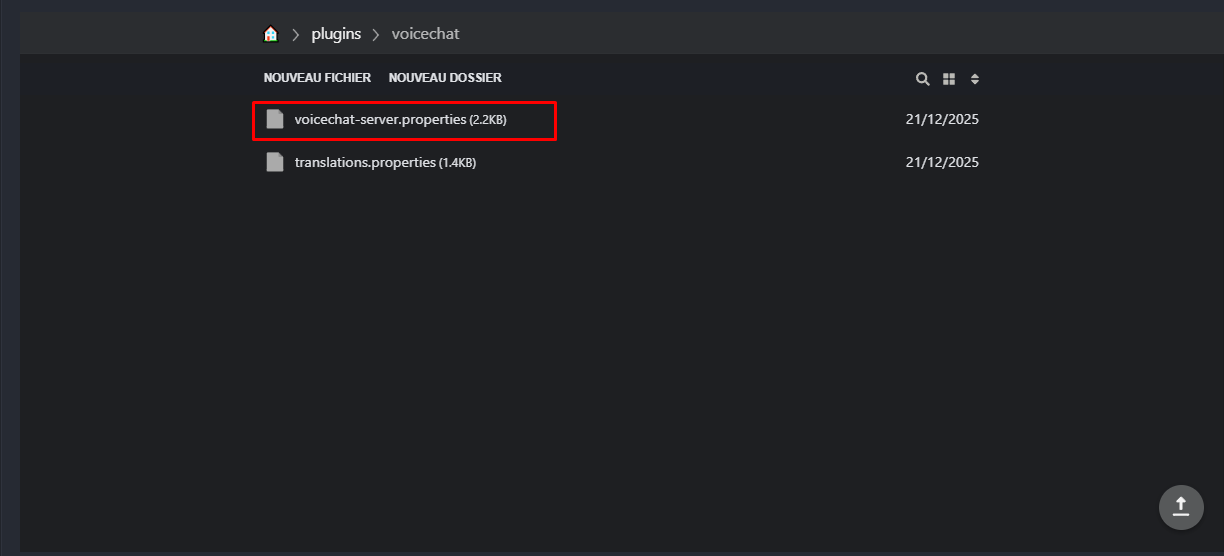
Open the configuration file, which here is called voicechat-server.properties. Note that depending on the plugin, this filename may change; most often it will be config.yml

-
Once inside, the goal is to find the plugin’s default port and replace it with your reserved port. Here it is on line 9 of our configuration.
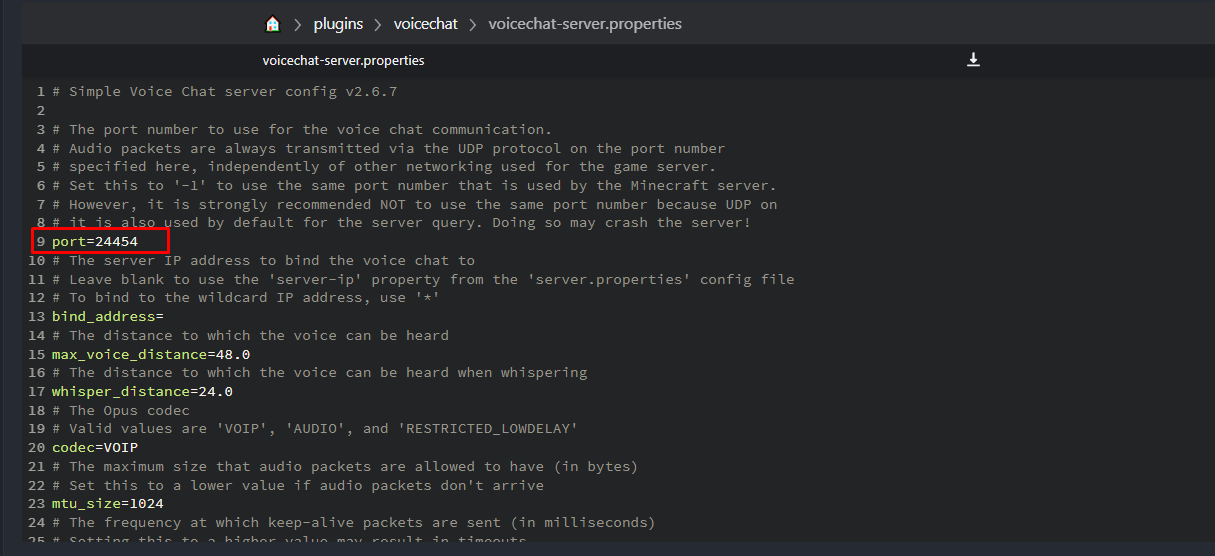
- Once identified, change the port to your reserved port (30000).
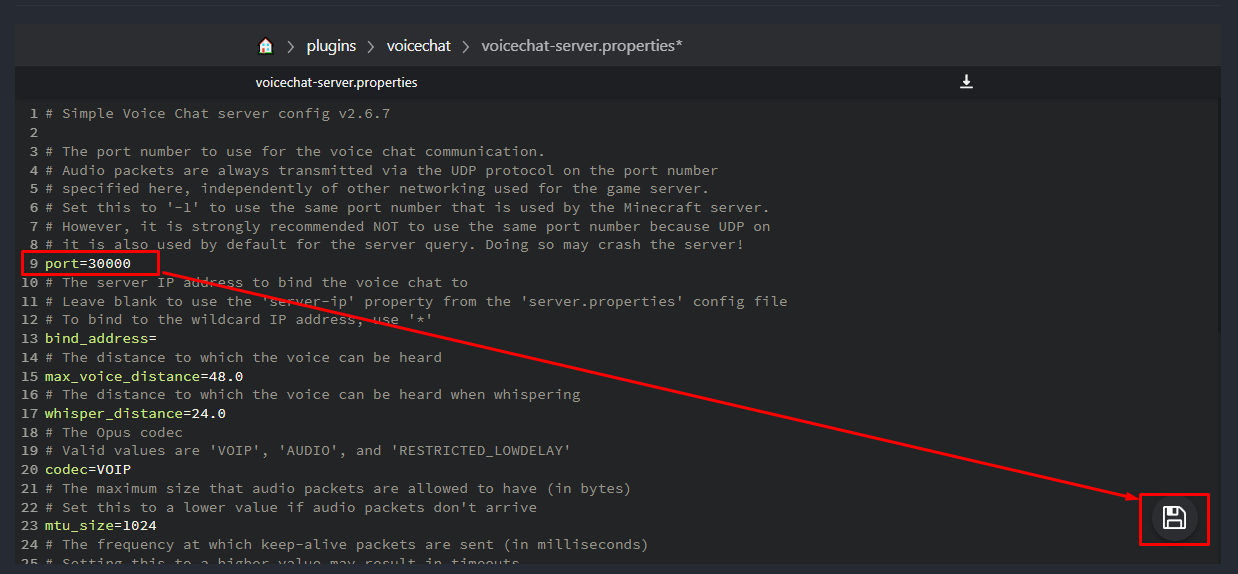
Once done, don’t forget to save using the button at the bottom right!
 Step 3: Restart the server
After making the change:
- Fully restart the server
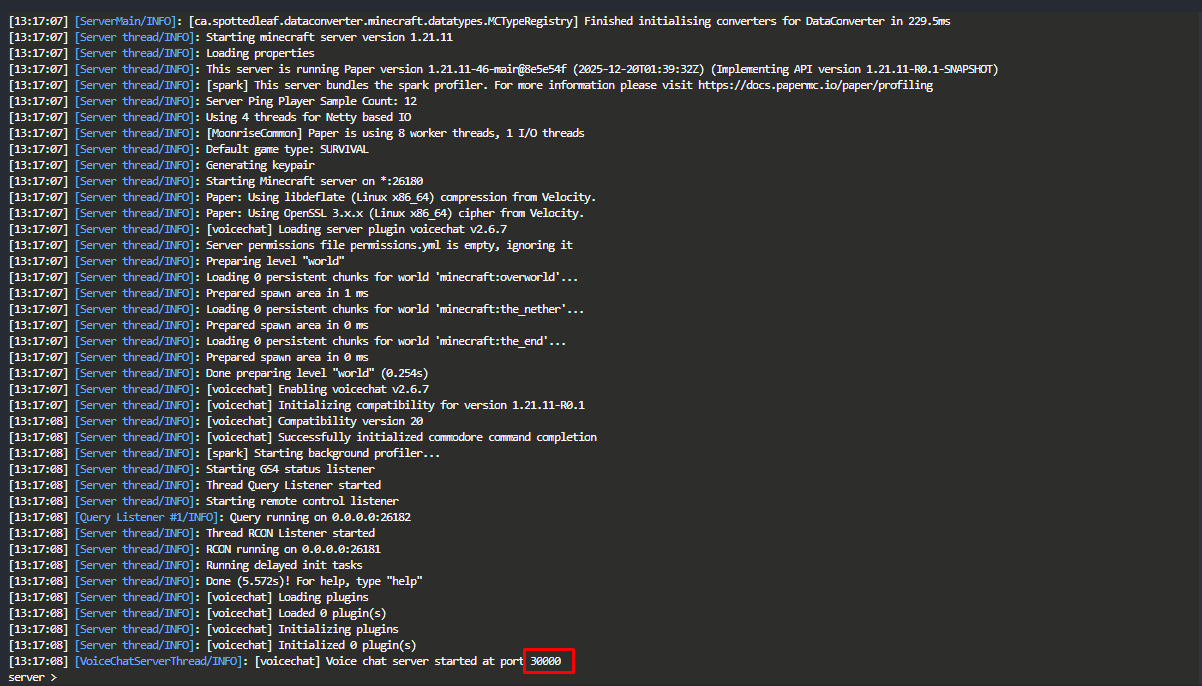
- Check the startup logs
- Make sure no port-related errors appear
If everything is correct, the service will be available immediately.
In our example, the console confirms the use of port 30000.
The Voice Chat plugin allows us to run an in-game test to see if the port responds.
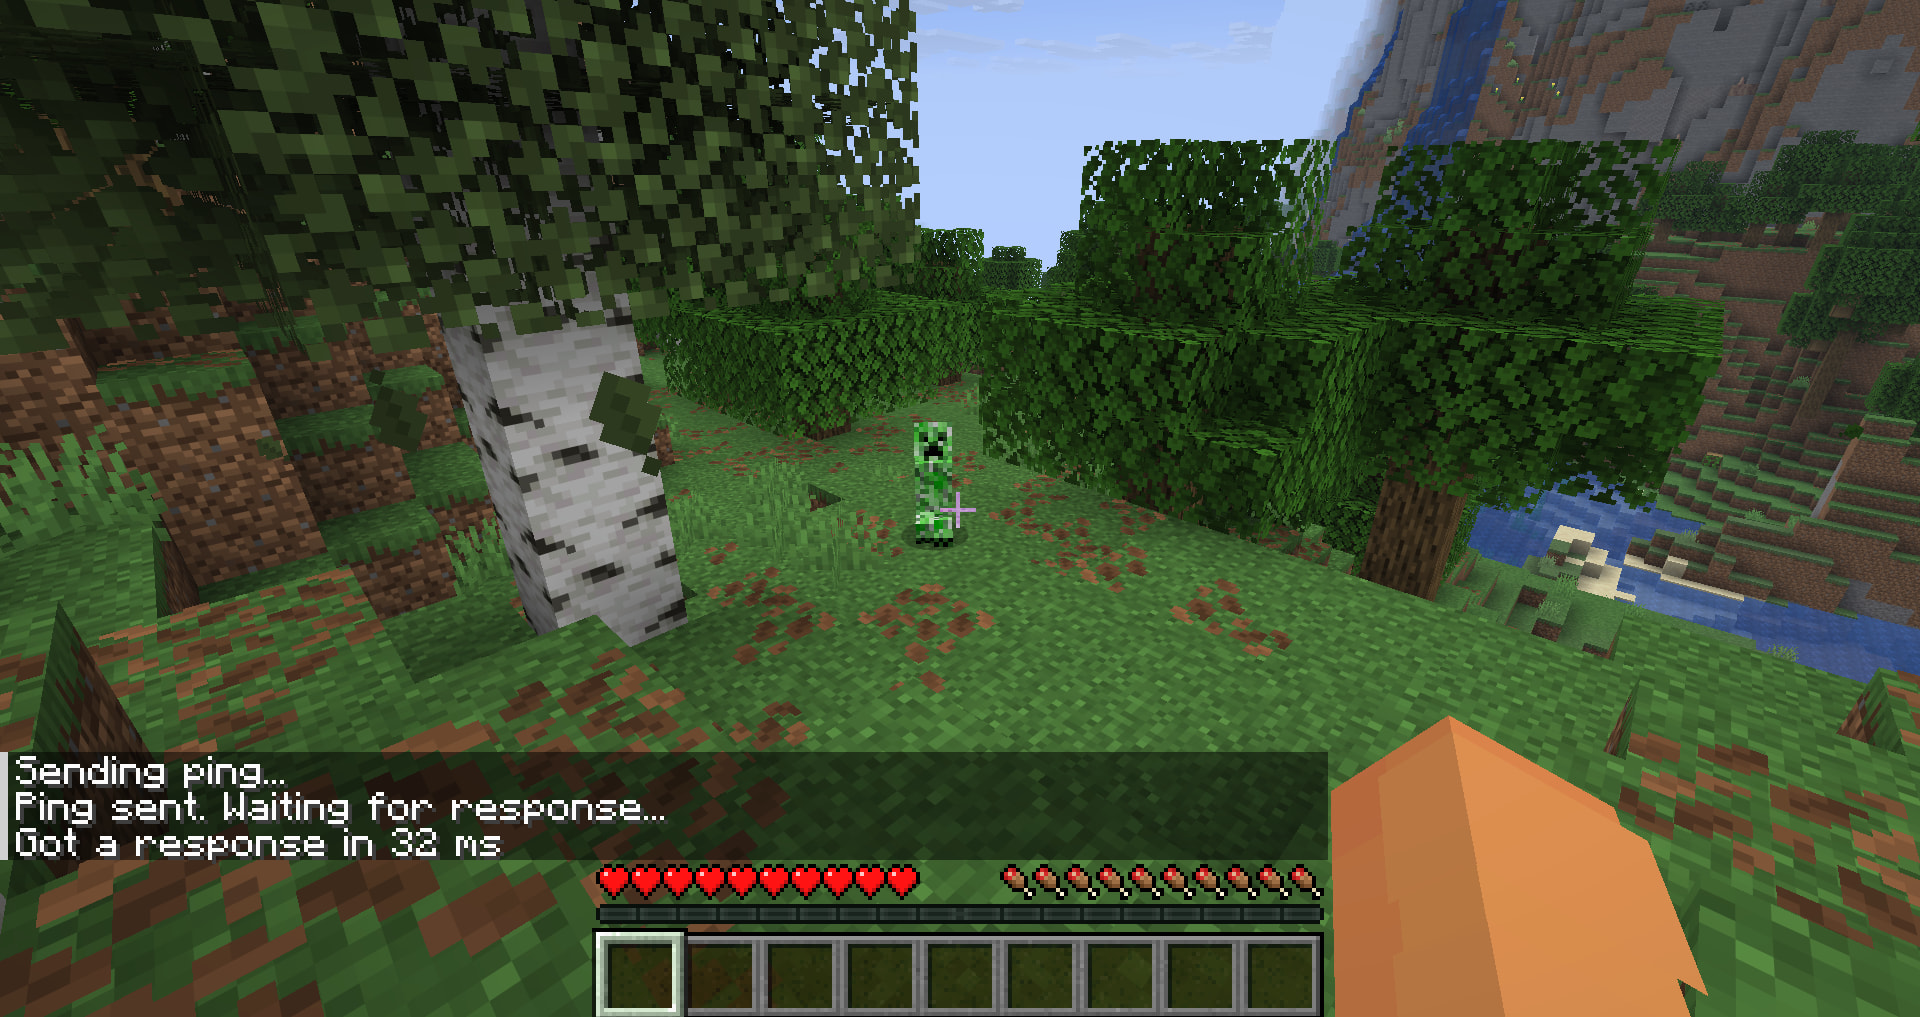
Our plugin confirms that everything is working — our port is properly assigned and functional!
 Troubleshooting
In case of issues:
- Check that the port used is the one you reserved
- Make sure no other service is using this port
- Check the server logs
Best practices
- Use one port per service
- Always restart after changing a port
- Add a description to your ports
 Conclusion
That’s it! Your reserved port is now configured and working. You can use this same method for all plugins that require a dedicated port (BlueMap, Dynmap, Votifier, Plan, etc.).
![]() Need more resources for your server?
Need more resources for your server?
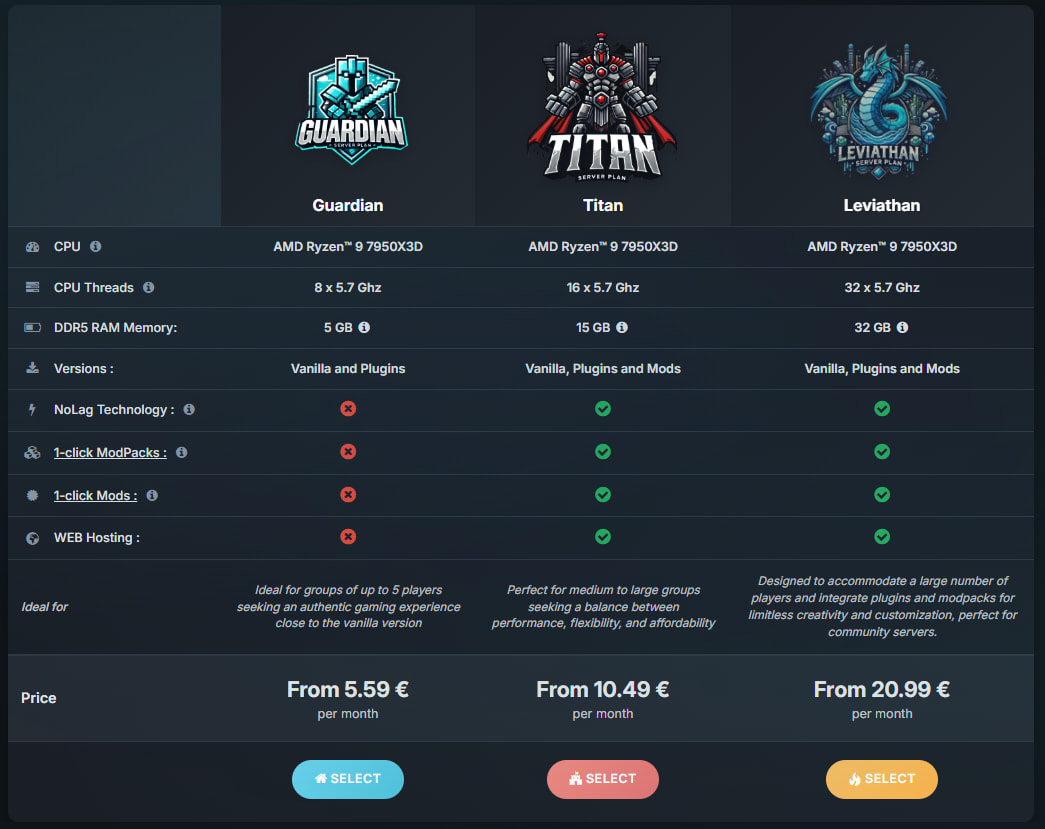
You can try this feature for free by testing our Minecraft offers with 12 hours of free access, using the link below :
More Articles
How to Configure GeyserMC on a Minecraft Server
December 26, 2025Minecraft 1.21.11: New Mounts and Combat Mechanics
December 26, 2025📘 Complete Minecraft Performance Optimization Guide (Spigot, Paper, Purpur, PufferFish)
November 09, 2025Minecraft 1.21.9: The Copper Age, what you need to know
October 06, 2025